


Before you even think about raising the walls of a new backyard shed, you need a solid foundation. Learn how to pour a concrete slab here.
How to Pour a Concrete Slab Successfully

Updated on Jun. 25, 2025
1
/
32
How to Pour a Concrete Slab: The Basics
The bulk of the work for a new slab is in the excavation and form building. If you have to level a sloped site or bring in a lot of fill, hire an excavator for a day to help prepare the site. Then figure on spending a day building the forms and another pouring the slab.
2
/
32

How Much to Pour a Concrete Slab: Estimate a Concrete Order
Here’s a brief rundown of what you need to know about concrete and concrete prices. We’ll use a 10 x 10 ft. slab as an example:
Calculate the volume you need in cubic yards. Multiply the length (10 ft.) by the width (10 ft.) by the depth (four inches or .35 ft.) and divide it by 27 (the number of cubic feet in a cubic yard). You get 1.3 cu. yds. Then add 10 percent to allow for spillage and slab depth variations to help determine the concrete cost per yard.
Don’t overspend on your next masonry job. Here’s how to estimate a concrete order:
3
/
32

How to Pour a Concrete Slab: Prep the Site
Before you get started, contact your local building department to see whether a permit is required and how close to the lot lines you can build. In most cases, you’ll measure from the lot line to position the slab parallel to it. Then drive four stakes to roughly indicate the corners of the new slab.
With the approximate size and location marked, use a line level and string or builder’s level to see how much the ground slopes. Flattening a sloped site means moving tons of soil. You can build up the low side, or dig the high side into the slope and add a low retaining wall to hold back the soil.
You’ll need fill material, and while some pros recommend sand, Martin is against this idea: “Sand does not work well as fill; it will move and settle over time, creating an uneven patio and a trip hazard. Washed concrete sand can be used as a bedding layer but should not exceed one to one-and-a-half inches thick. The base should consist of a minimum of four to six inches of crushed gravel or concrete.”
4
/
32
Get more expert tips for pouring a concrete slab yourself in this video:
5
/
32
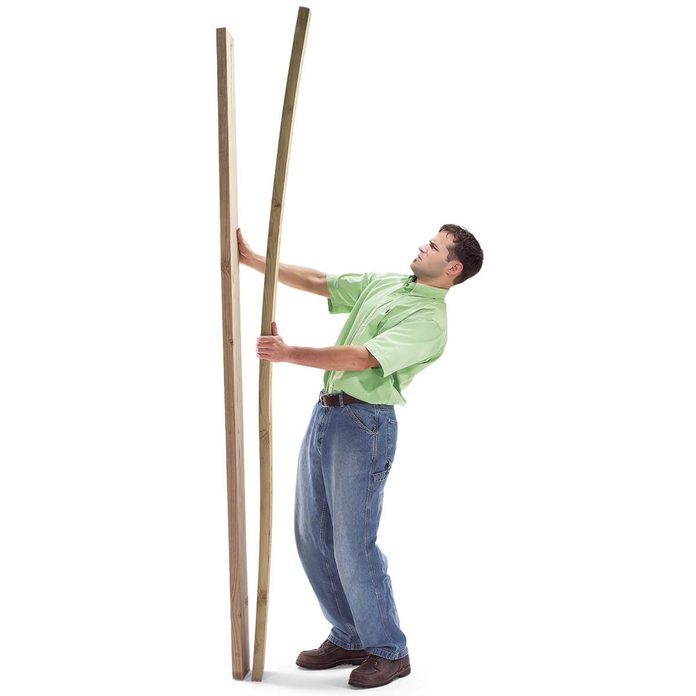
Choose Boards for the Form
Start by choosing straight form boards. For a five-inch-thick slab with thickened edges, which is perfect for most garages and sheds, 2×12 boards work best. For a driveway or other slab without thickened edges, use 2x6s. If you can’t get long enough boards, splice them together by nailing a four-foot 2×12 cleat over the joint. Sight down the boards to make sure they’re aligned and straight before nailing on the cleat.
6
/
32
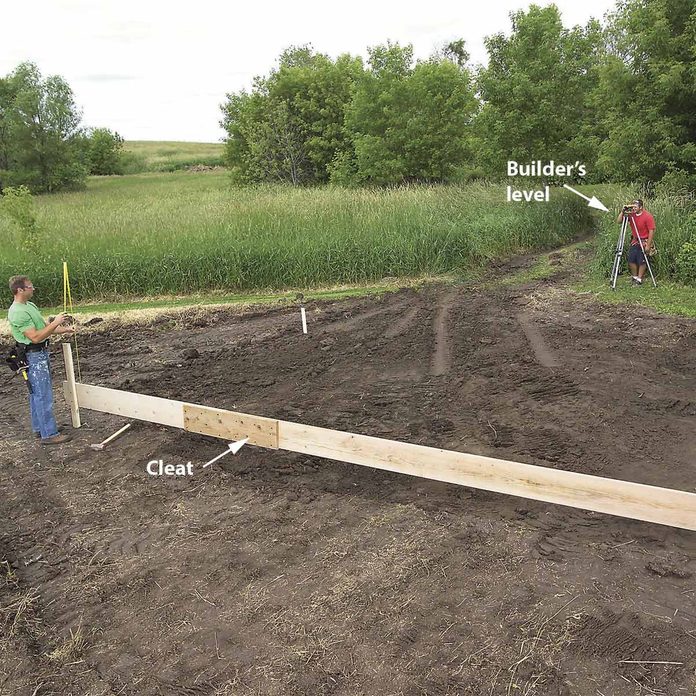
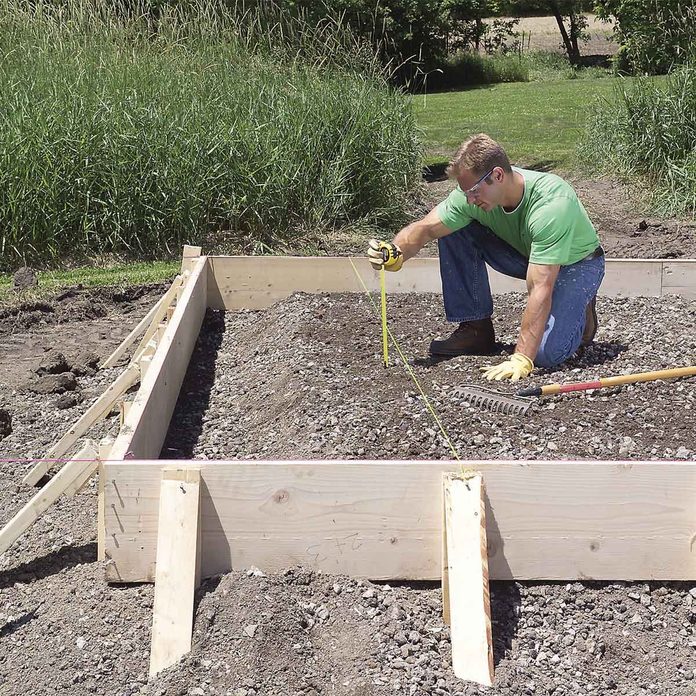
Secure the First Form Board
Drive a stake into the ground at each corner of the slab area. Cut one side of the form to length and nail it to a corner stake. Level the board and nail it to the second corner stake. Stretch a mason’s line just above the top edge of the board, align the board with the string and brace it with pairs of 2x4s every two feet. To absorb the shock and make nailing easier, hold a sledgehammer behind the stakes and form boards as you nail.
7
/
32
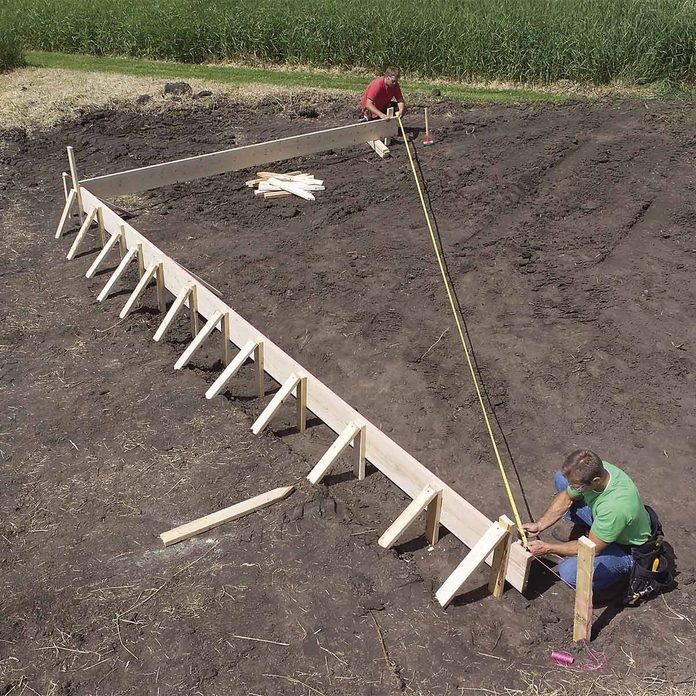
Finish the Form
Cut a second board to the width of the slab. Nail one end to the braced form and use the calculated length of the diagonal to set the form at 90 degrees. Drive a stake at the end. Level, straighten and brace the second form board. Add the third side.
Note: Cut the two side form boards three inches longer than the length of the slab. Then cut the end boards to the exact width of the slab. You’ll nail the end boards between the side boards to create the correct size form. Use 16d duplex (double-headed) nails to connect the form boards and attach the bracing. Nail through the stakes into the forms.
8
/
32

Calculate How Much Fill You’ll Need
The key to crack-resistant concrete is a firm base that drains well. Unless you have sandy soil, this means adding a layer of gravel.
With the forms in place, you can estimate how much fill you need. To calculate the amount of fill needed, stretch a string across the top of the forms and measure down to the ground. Do this in three or four spots and average the results. Subtract the thickness of your slab. Then use this depth to calculate the cubic yards of fill needed. Be sure to ask what your supplier recommends for fill under slabs. Crushed concrete compacts and drains well.
For smaller concrete projects, follow these tips for mixing concrete to the perfect consistency.
9
/
32
Fill and Level the Base
Spread the fill in layers no more than three inches thick and tamp each layer with a rented plate compactor. Leave a 12-inch-deep by 12-inch-wide trench around the perimeter for a thickened edge. If you’re building a heated structure on the slab, cover the ground inside the concrete forms with six-mil polyethylene sheeting. Otherwise you can leave it uncovered.
10
/
32
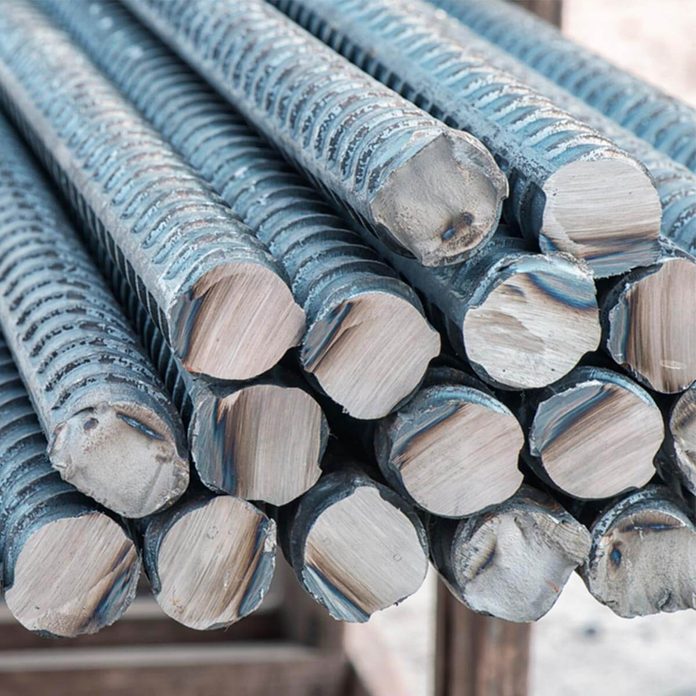
Reinforce with Rebar
Concrete needs reinforcement for added strength and crack resistance. It’s well worth the small additional cost, labor and investment in tools to install half-inch rebar (steel reinforcing bar).
“Concrete isn’t particularly strong without reinforcement,” says Martin. “The spacing and type of reinforcement depend on the loads and the climate. In general, though, half-inch rebar on 24-inch centers or wire mesh is frequently used in our area (PA/Northeast).”
You’ll find rebar at home centers and at suppliers of concrete and masonry products (in 20-ft. lengths). You’ll also need a bundle of tie wires and a tie-wire twisting tool to connect the rebar.
11
/
32
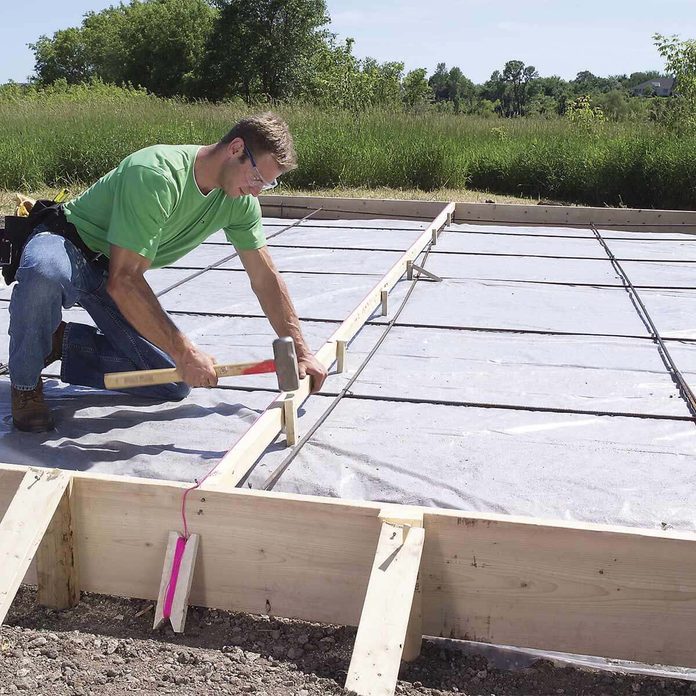
Lay Out the Rebar Grid
Cut and bend pieces of rebar to form the perimeter reinforcing. Splice the pieces together by overlapping them at least six inches and wrapping tie wire around the overlap. Wire the perimeter rebar to rebar stakes for support. Then cut and lay out pieces in a four-foot-on-center grid pattern. Wire the intersections together. You’ll pull the grid up into the center of the concrete as you pour the slab.
12
/
32
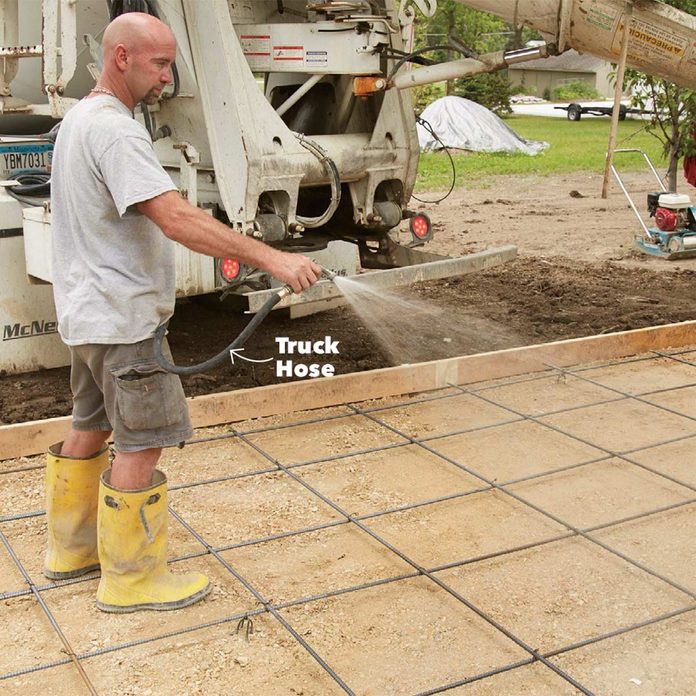
Dampen the Base to Lengthen Finish Time
To extend your finish time on hot, sunny days, spray bone-dry ground with water to keep the base from sucking the water out of the concrete. A water spray also slows down curing, which makes for a stronger slab.
If there’s no hose bib nearby, you can use the water and hose that are onboard the truck. If you don’t have water on site, also use the truck hose to fill a couple buckets of water for cleaning your tools after the truck leaves.
13
/
32
Pouring Day Prep
Have at least two contractor-grade wheelbarrows on hand and three or four strong helpers. Plan the route the truck will take. For large slabs, it’s best if the truck can back up to the concrete forms. Avoid hot, windy days if possible. This kind of weather accelerates the hardening process—a slab can turn hard before you have time to trowel a nice smooth finish. If the forecast calls for rain, reschedule the concrete delivery to a dry day. Rain will ruin the surface.
14
/
32

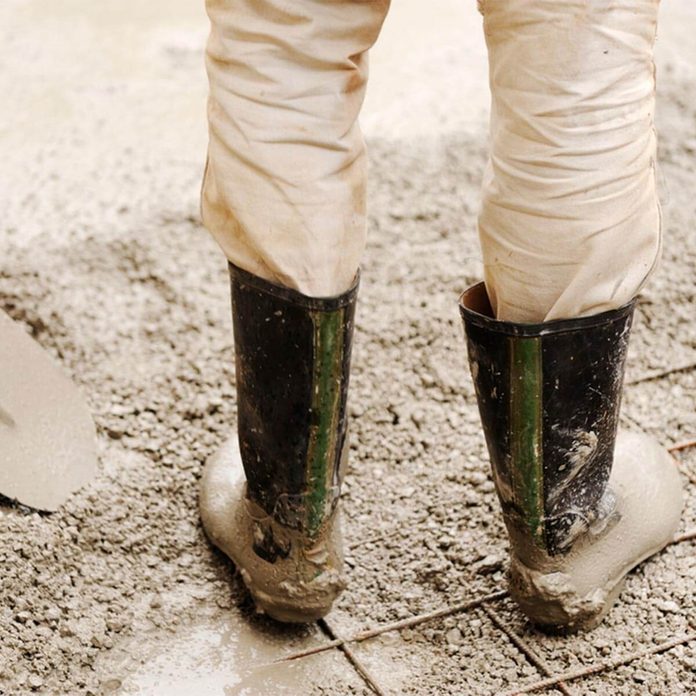
Safety Gear
- Wet concrete on skin can cause everything from mild redness to third-degree, permanently disfiguring chemical burns. You and your helpers should take these steps:
- Wear eye protection. Sandy concrete splashes can wreak havoc with your eyes. Wear long pants and long sleeves to protect your skin.
- Wear tall rubber boots if you have to wade in wet concrete.
- Wear gloves (rubber gloves are the safest bet).
Plus: Safety gear every DIYer should own.
15
/
32
Drier Mix is Better
Adding water to the concrete makes it flow down the chute and fill your forms more easily, but it also weakens the final slab. A drier mix is more difficult to pack into your form, especially around the edges, but makes for a stronger, more crack-resistant slab.
16
/
32
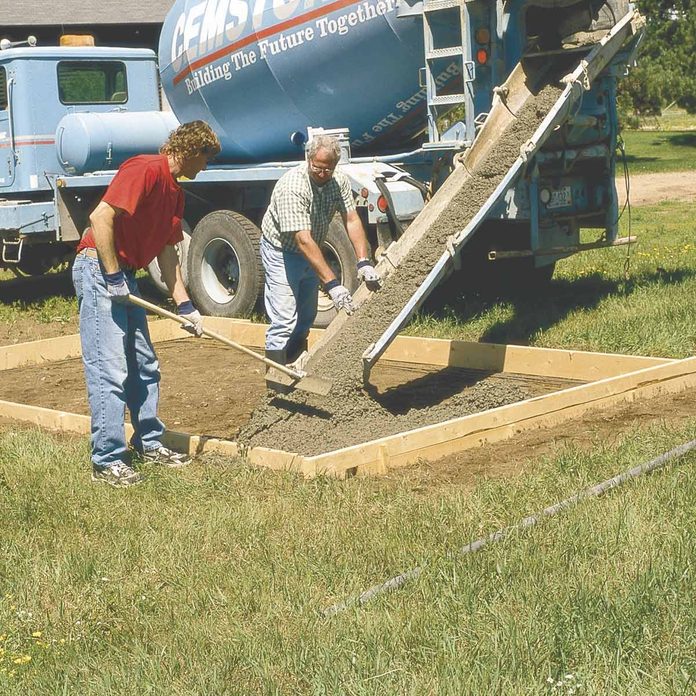
Pour in Sections
Pour the concrete in small sections, spreading the concrete by moving the chute back and forth and by having the driver pull forward as you go. Once the truck has reached the end of a section, spread the concrete out evenly, and a touch higher than the form, with a concrete placer/rake. Don’t fill the whole form or giant sections because the mound of extra concrete you’ll drag back with the screed board will get too heavy.
17
/
32
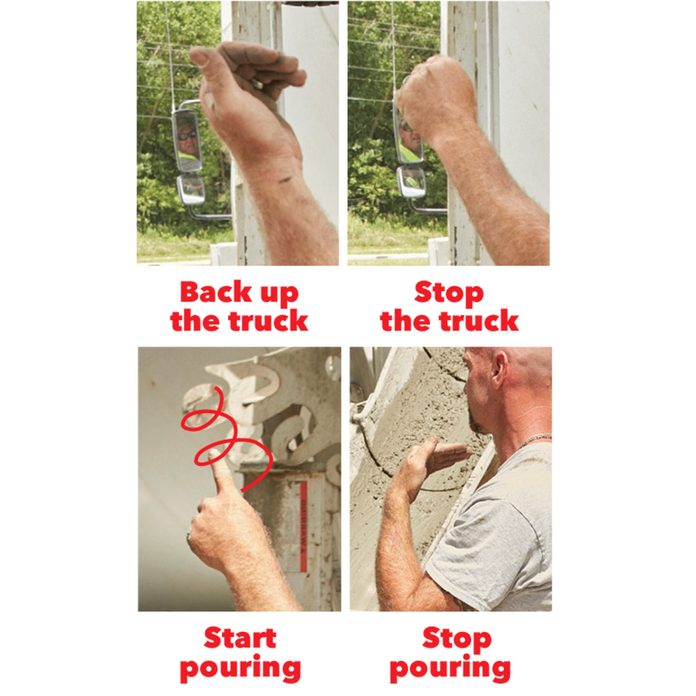
Concrete Pouring Communication
Here are some basic hand signals to help you communicate with the truck driver. Make sure you can see the driver’s face in the side-view mirror—if you can’t see him, he can’t see you.
18
/
32

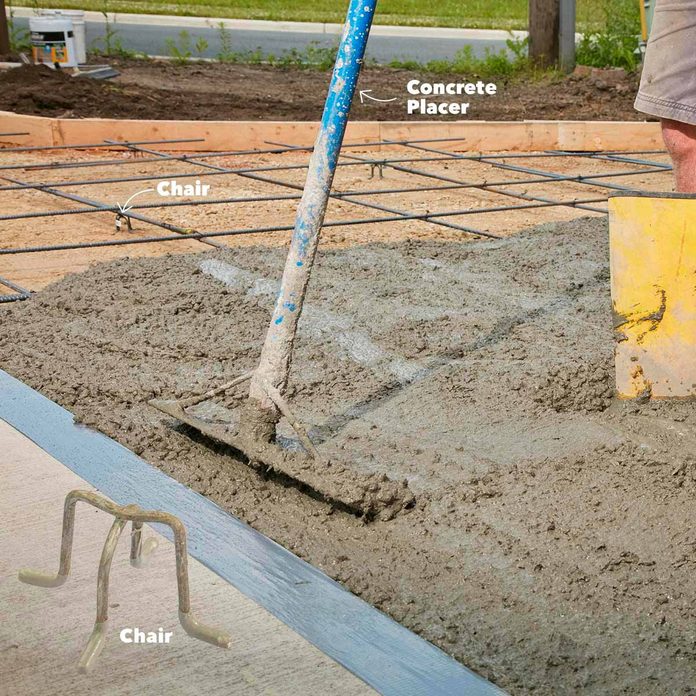
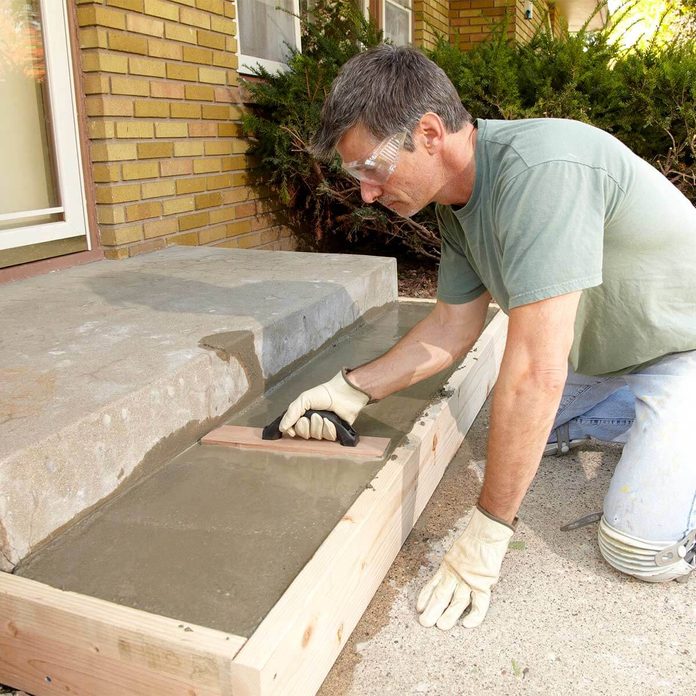
Initial Leveling
Drag a straight 2×4 (screed board) across the top of the concrete forms to level the concrete. Make multiple passes if needed to create a flat, evenly filled area. Have a helper add or remove concrete in front of the screed as you pull it. Check out the detailed steps for pouring a perfect concrete slab here.
19
/
32
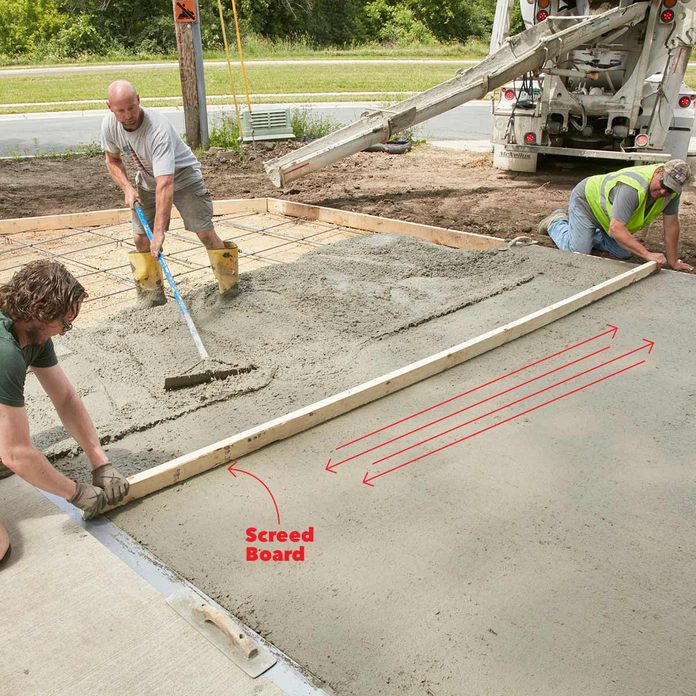
Screed Board Basics
Pull back the excess concrete with the screed board. As you pull, slide the screed board back and forth to help you prevent voids in the surface. Have a mucker (that’s what they’re really called) pull the excess back and fill in low spots during the screeding process. You want enough concrete to fill all voids, but not so much that it’s difficult to pull the board. About one-half to one inch deep in front of the screed board is about right.
It’s better to make several passes with the screed board, moving a little concrete each time, than to try to pull a lot of concrete at once.
20
/
32
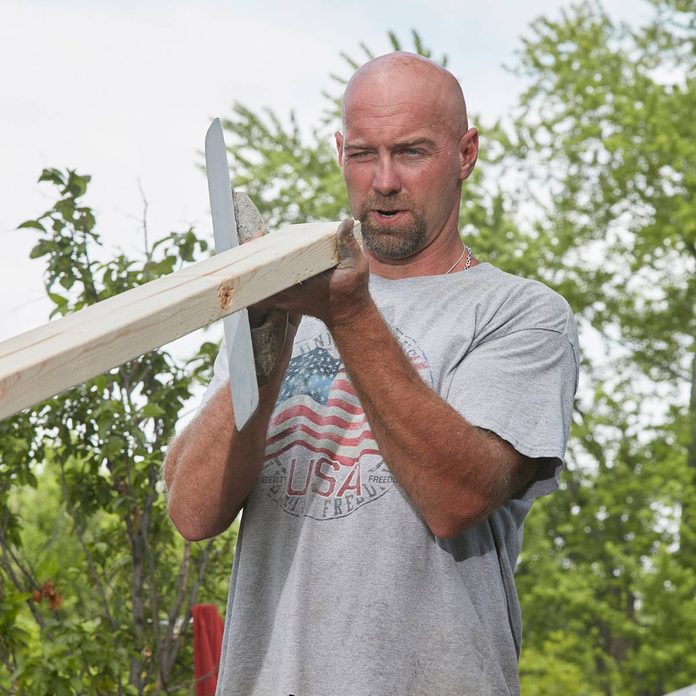
Screeding Tip
A slight crown (bow) in the screed board is not only OK; it’s preferred. Just make sure the crown side is facing up. That will create a slight hump down the middle of the slab, so water will drain off. If the crown faces down, you’ll end up creating a trough in the slab where water can pool.
21
/
32
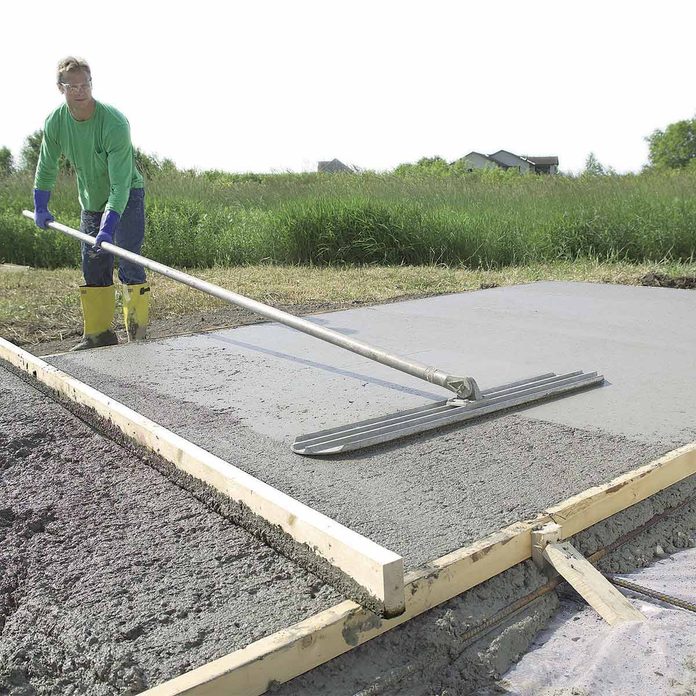
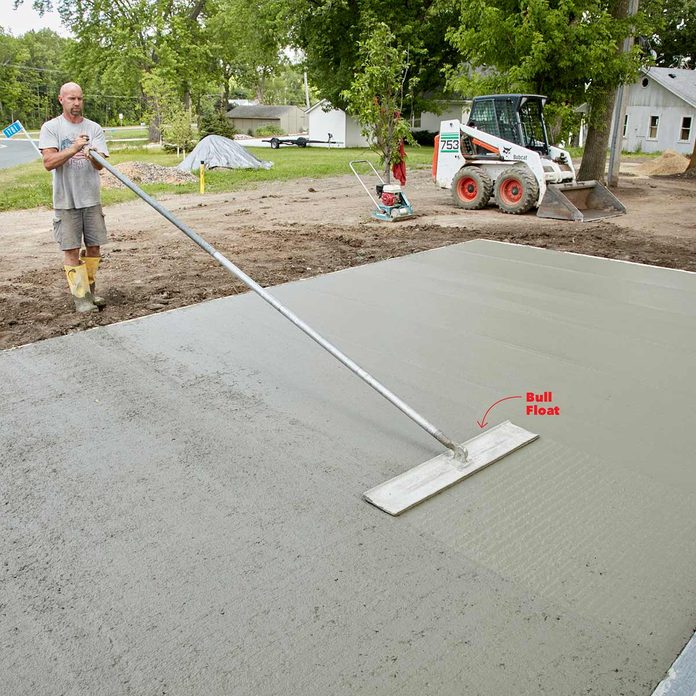
Bull Float to Smooth the Surface
Start bull-floating the concrete as soon as possible after screeding. The goal is to remove marks left by screeding and fill in low spots to create a flat, level surface. Bull-floating also forces larger aggregate below the surface.
Keep the leading edge of the float just slightly above the surface by raising or lowering the float handle. If the float angle is too steep, you’ll plow the wet concrete and create low spots. Three or four passes with the bull float is usually sufficient. Too much floating can weaken the surface by drawing up too much water and cement.
22
/
32
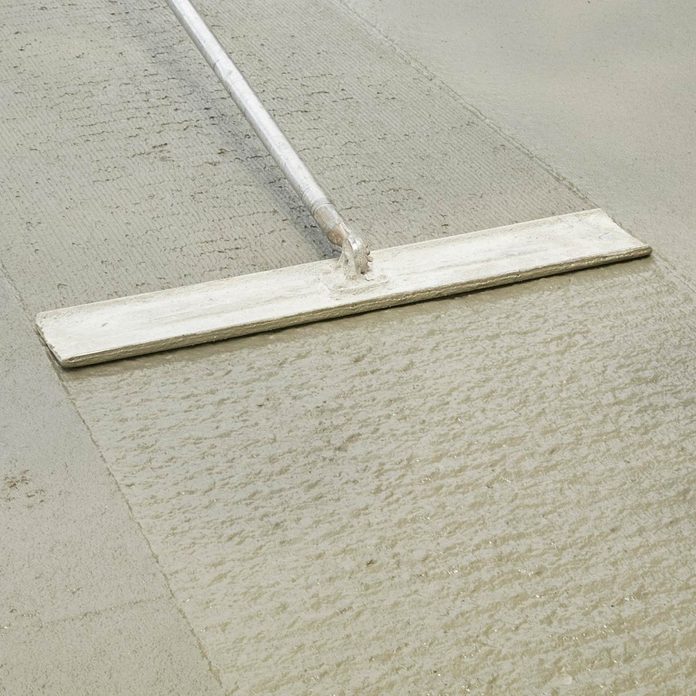
Bull-Float Tip
Larger aggregate (chunks of gravel) near the surface may cause spalling (chipping). Our expert pushes the larger rocks deeper into the mix. He does this by making small stabbing motions with the float on the first return pass. Start floating the slab immediately after the pour is complete
23
/
32
Float in Two Directions When Possible
In addition to pushing the aggregate down under the surface, a bull float helps level the slab, so start floating right after you screed, while the concrete is still wet enough to shape.
Whenever possible, run the bull float perpendicular to the direction you pulled the concrete with the screed board (this slab was too long to do that). That will help to smooth out the ridges, troughs and valleys created by screeding. Our expert likes to float in both directions when he can.
Need to remove a concrete slab? Here’s what you need to know.
24
/
32
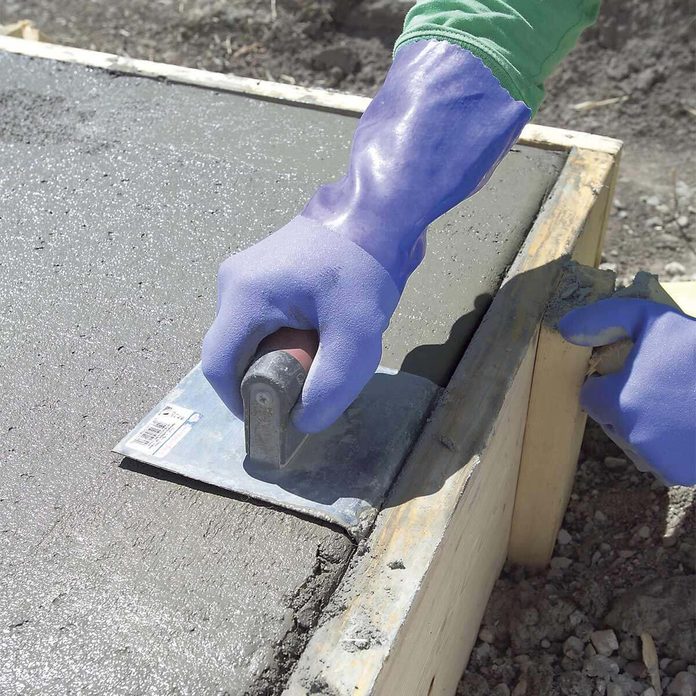
Round the Edges
Round the edges of the slab with an edging tool after any surface water disappears. Work the edger until the edge is solid and smooth. The concrete should be firm before you start edging. If the edger is leaving behind large wet grooves, wait awhile before you continue. Longer strokes will result in straighter lines.
25
/
32

Hand Float as Needed
Run a hand float over the ridges left behind by the edger. A hand float is also a good tool for dragging small amounts of material or moisture (cream) into any voids or dry spots near the edge.
26
/
32

Add Control Joints
“Concrete is rigid and has no flexibility, so minor flexing, settling, and shrinkage during curing will create cracks,” advises Martin. “Cutting control joints (aka relief joints) provides a method to relieve that tension on the concrete slab and helps limit cracking. Relief joints are typically cut after the concrete is solid but before it is fully cured. Timing will depend on temperatures and sunlight exposure.”
Cut in control joints to create individual sections no larger than 8 x 8 ft. for a 3-1/2-in.-thick slab, and no larger than 10 x 10 ft. for a 5-1/2-in.-thick slab.
Want a change for your old concrete patio? Cover it with pavers.
27
/
32

Nonslip Surface Ridges
A broom finish creates a nonslip surface for wet conditions. The harder the concrete, the less rough the broom will leave the surface. Try to achieve a surface rough enough for traction but not so rough that it hurts to walk on barefoot. If the broom starts to bounce as you pull, lower the angle of the handle. If possible, broom perpendicular to the direction that the slab is most visible. Wavy, crooked broom lines are less noticeable that way.
Learn how to stain concrete for a beautiful finish.
28
/
32
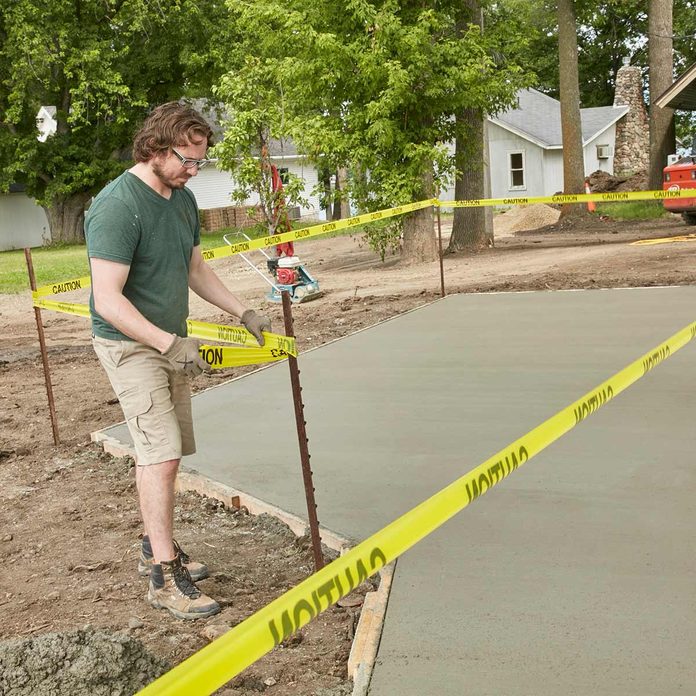
Post-Pour Prep
The slab can be walked on and the forms pulled in 24 hours. Wait at least 10 days to drive on it, and avoid spreading any ice melting chemicals for the first two years. Ask your neighbors to keep an eye on their pets before you pour, and use caution tape around the area to warn the pesky neighbor kids.
Learn how to remove stains from concrete.
29
/
32
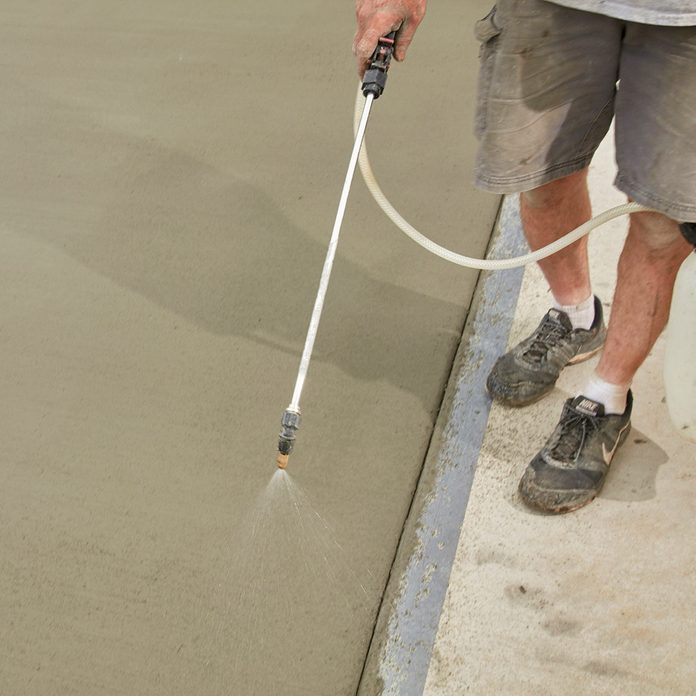
Dampen to Cure Slowly
Keep concrete moist after it’s poured so it cures slowly and develops maximum strength. The easiest way to ensure proper curing is to spray the finished concrete with curing compound. Curing compound is available at home centers. Follow the instructions on the label. Use a regular garden sprayer to apply the compound. You can lay plastic over the concrete instead, although this can lead to discoloration of the surface.
How to fix cracks in concrete.
30
/
32
How to Pour Concrete Steps
Cutting away the damaged concrete and pouring a new concrete cap on the step can often repair badly broken concrete steps. The fix will be durable and you avoid the high expense of a complete tear-out.
31
/
32

Leftover Concrete Project
Add a touch of charm to your front yard by creating oversized concrete house numbers.
32
/
32

Build a Table with a Concrete Top
Here’s another idea for using leftover concrete: Create a polished concrete table with a solid wood base, with inlays of glass, leaves, tile or other materials. This project is simple enough for even beginning woodworkers to tackle.
FAQ
Do I need a permit to pour a concrete slab?
That depends on a number of factors, including the size of the slab, its intended use and local zoning regulations. You generally don’t need a permit for a patio slab under 120 square feet in size, but you will need one if you build a structure on top of it. The reason is that the building authorities want to make sure that the slab can support the weight of the structure.
In addition, some communities have zoning regulations that determine where you can place a slab on your property and how big it can be. It’s always a good idea to check with your local building department before you start work.
What’s the best weather for pouring concrete?
It isn’t a good idea to pour concrete in excessively hot weather, because the mixture may dry too quickly and crack. Similarly, if you pour concrete when it’s too cold, the mixture may cure too slowly or even freeze, which can also cause cracking and weakness.
The ideal temperature is between 50 and 60 degrees Fahrenheit, and of course, you want to do the job in dry weather, not while it’s raining.
About the Expert
- Jeremy Martin is an expert in patio and hardscape design and installation, with over 20 years of experience. He is the CEO of Willow Gates Home & Landscaping.